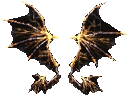
 WINGS
WINGS Wings Level 120%
 Wings Level 220%Wings Level 2.5100%Wings Level 3100%
 Weapon → Wing (Chaos)40%
 PETS & MOUNTS
 Dinorant30%
 Piece of Horn1%
 Broken Horn50%Horn of Fenrir (normal)30%Fenrir Upgrade40%Fenrir Gold20%
Getting the Most Out of Wings & Pets
Why wings are a real upgrade, not a skin
Wings aren't just the flight animation — every tier adds a real damage and defense bonus on top of whatever you're wearing, which is why level 3 wings count as a genuine endgame slot. They don't compete with your weapon or armor for a slot either, so a wing tier is pure upside once you can afford it.
You can't skip tiers: level 2 needs a level 1 wing as input, level 2.5 needs a level 2, and level 3 needs a level 2.5 plus extra materials — the chain above shows exactly what each step costs and its current success rate. Budget for more than one attempt per step, since a failed roll still consumes what you put in.
If you never got a level 1 wing from a drop, the 'Weapon → Wing (Chaos)' row is the other way in — it converts a weapon combination into a starting wing instead.
Pets and mounts: building the Fenrir
Dinorant is the easiest mount to get and a reasonable stopgap while you're still gearing up. The Horn of Fenrir is the long-term goal: it's built in stages rather than found finished, and each stage consumes the item from the previous one plus extra materials — the same pattern as the wing chain above.
Because every stage can fail, reaching Fenrir Gold takes clearing each earlier stage first and then succeeding at the hardest roll of the chain — the rates don't compound in your favor. Gathering spare materials for at least one retry per stage saves a lot of frustration.
How this fits into the Chaos Machine
All of the combinations above — wings, Dinorant, every Fenrir stage — are executed in the Chaos Machine, not from an item's own menu. Each row links straight to its recipe there, so you can see exactly what it asks for before you commit anything.
Because the machine consumes everything you put in either way, it's worth reading the full recipe first — confirming you have every piece, not just the headline item — rather than finding out you're missing a material after the jewels are already gone.